
Category Archives: Uncategorized
I was inspired by a Pinterest post and used a recipe like this one to try making my own deodorant/antiperspirant. I like the idea of using fewer chemicals in my cleaning and hygiene products, but I am a fan of antiperspirant. All the alternative products I’ve tried so far are only deodorant and never quite made the grade.

I packed my concoction in an old deodorant tube and tried it for a week. It controlling my odor well, but the baking soda left my armpits feeling gritty and I started getting all red and raw. The other draw back was the coconut oil kept melting, so if I wanted it solid I had to store it in the fridge.
So, a good try, but not successful for me.
Next project!
I started this while Robin was in the hospital. With a few tweeks, I made these based on local native birds. Here are some photos!

Western Robin

Western Meadowloark
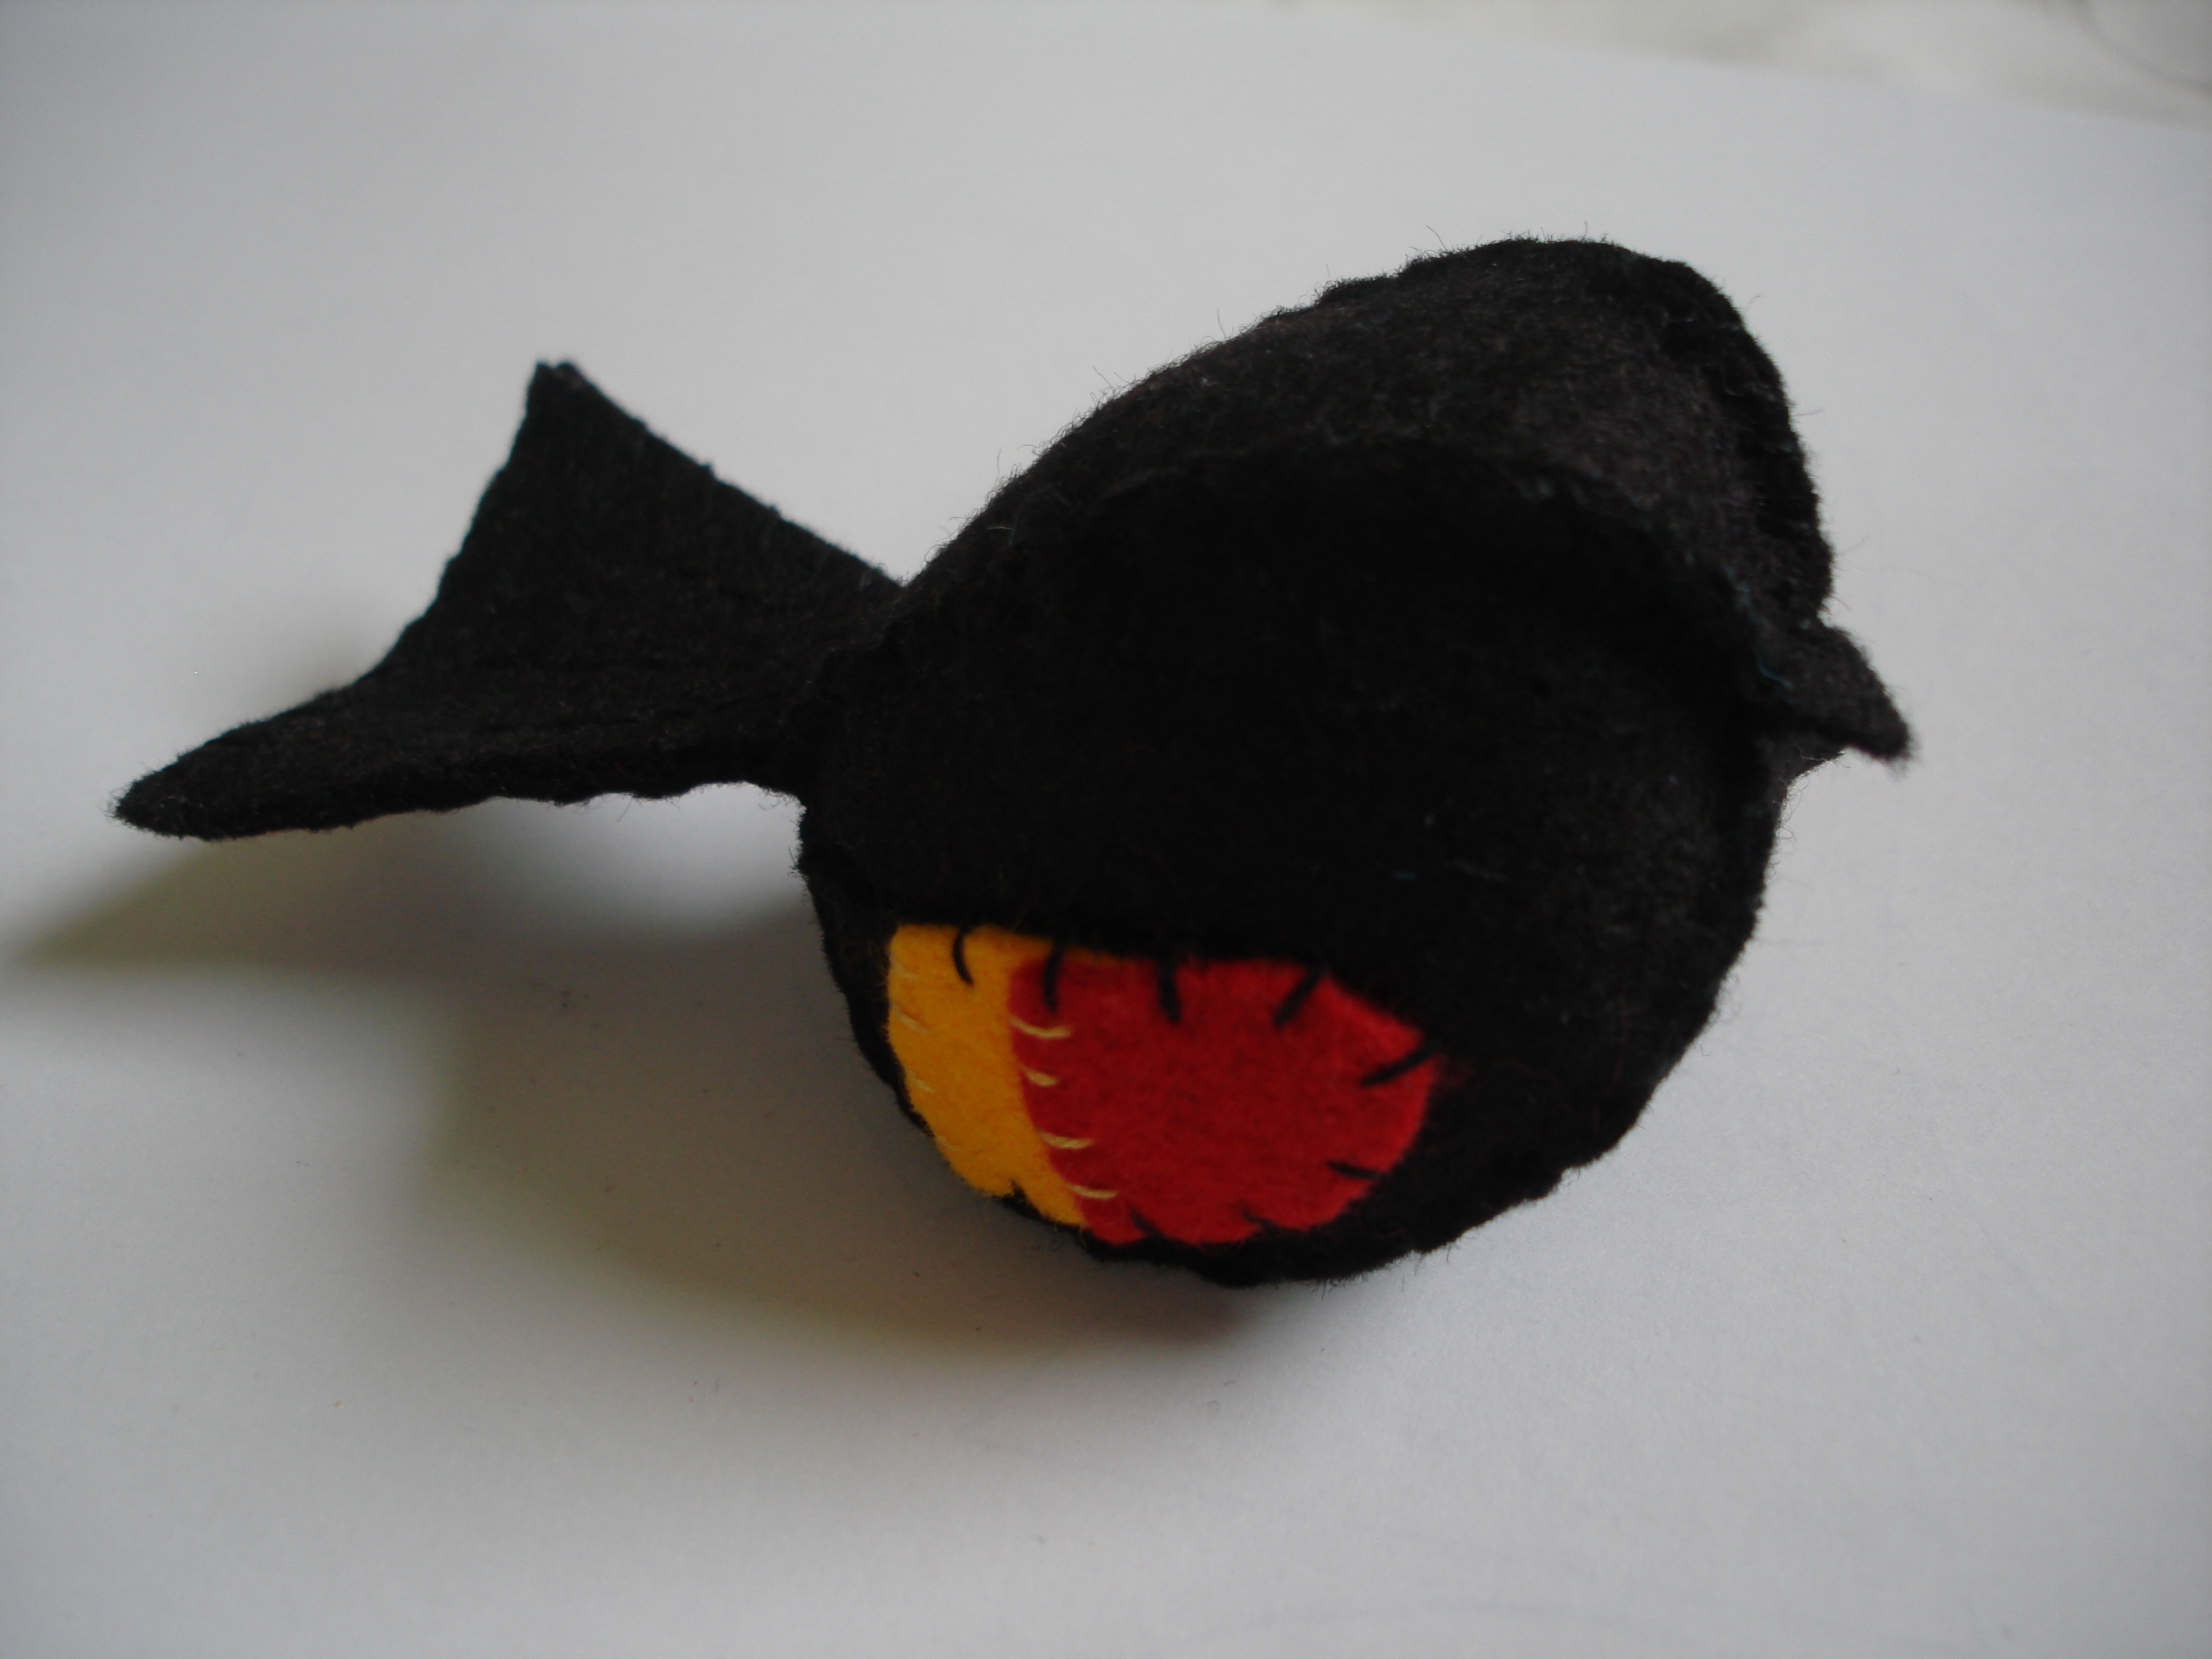
Red Wing Blackbird
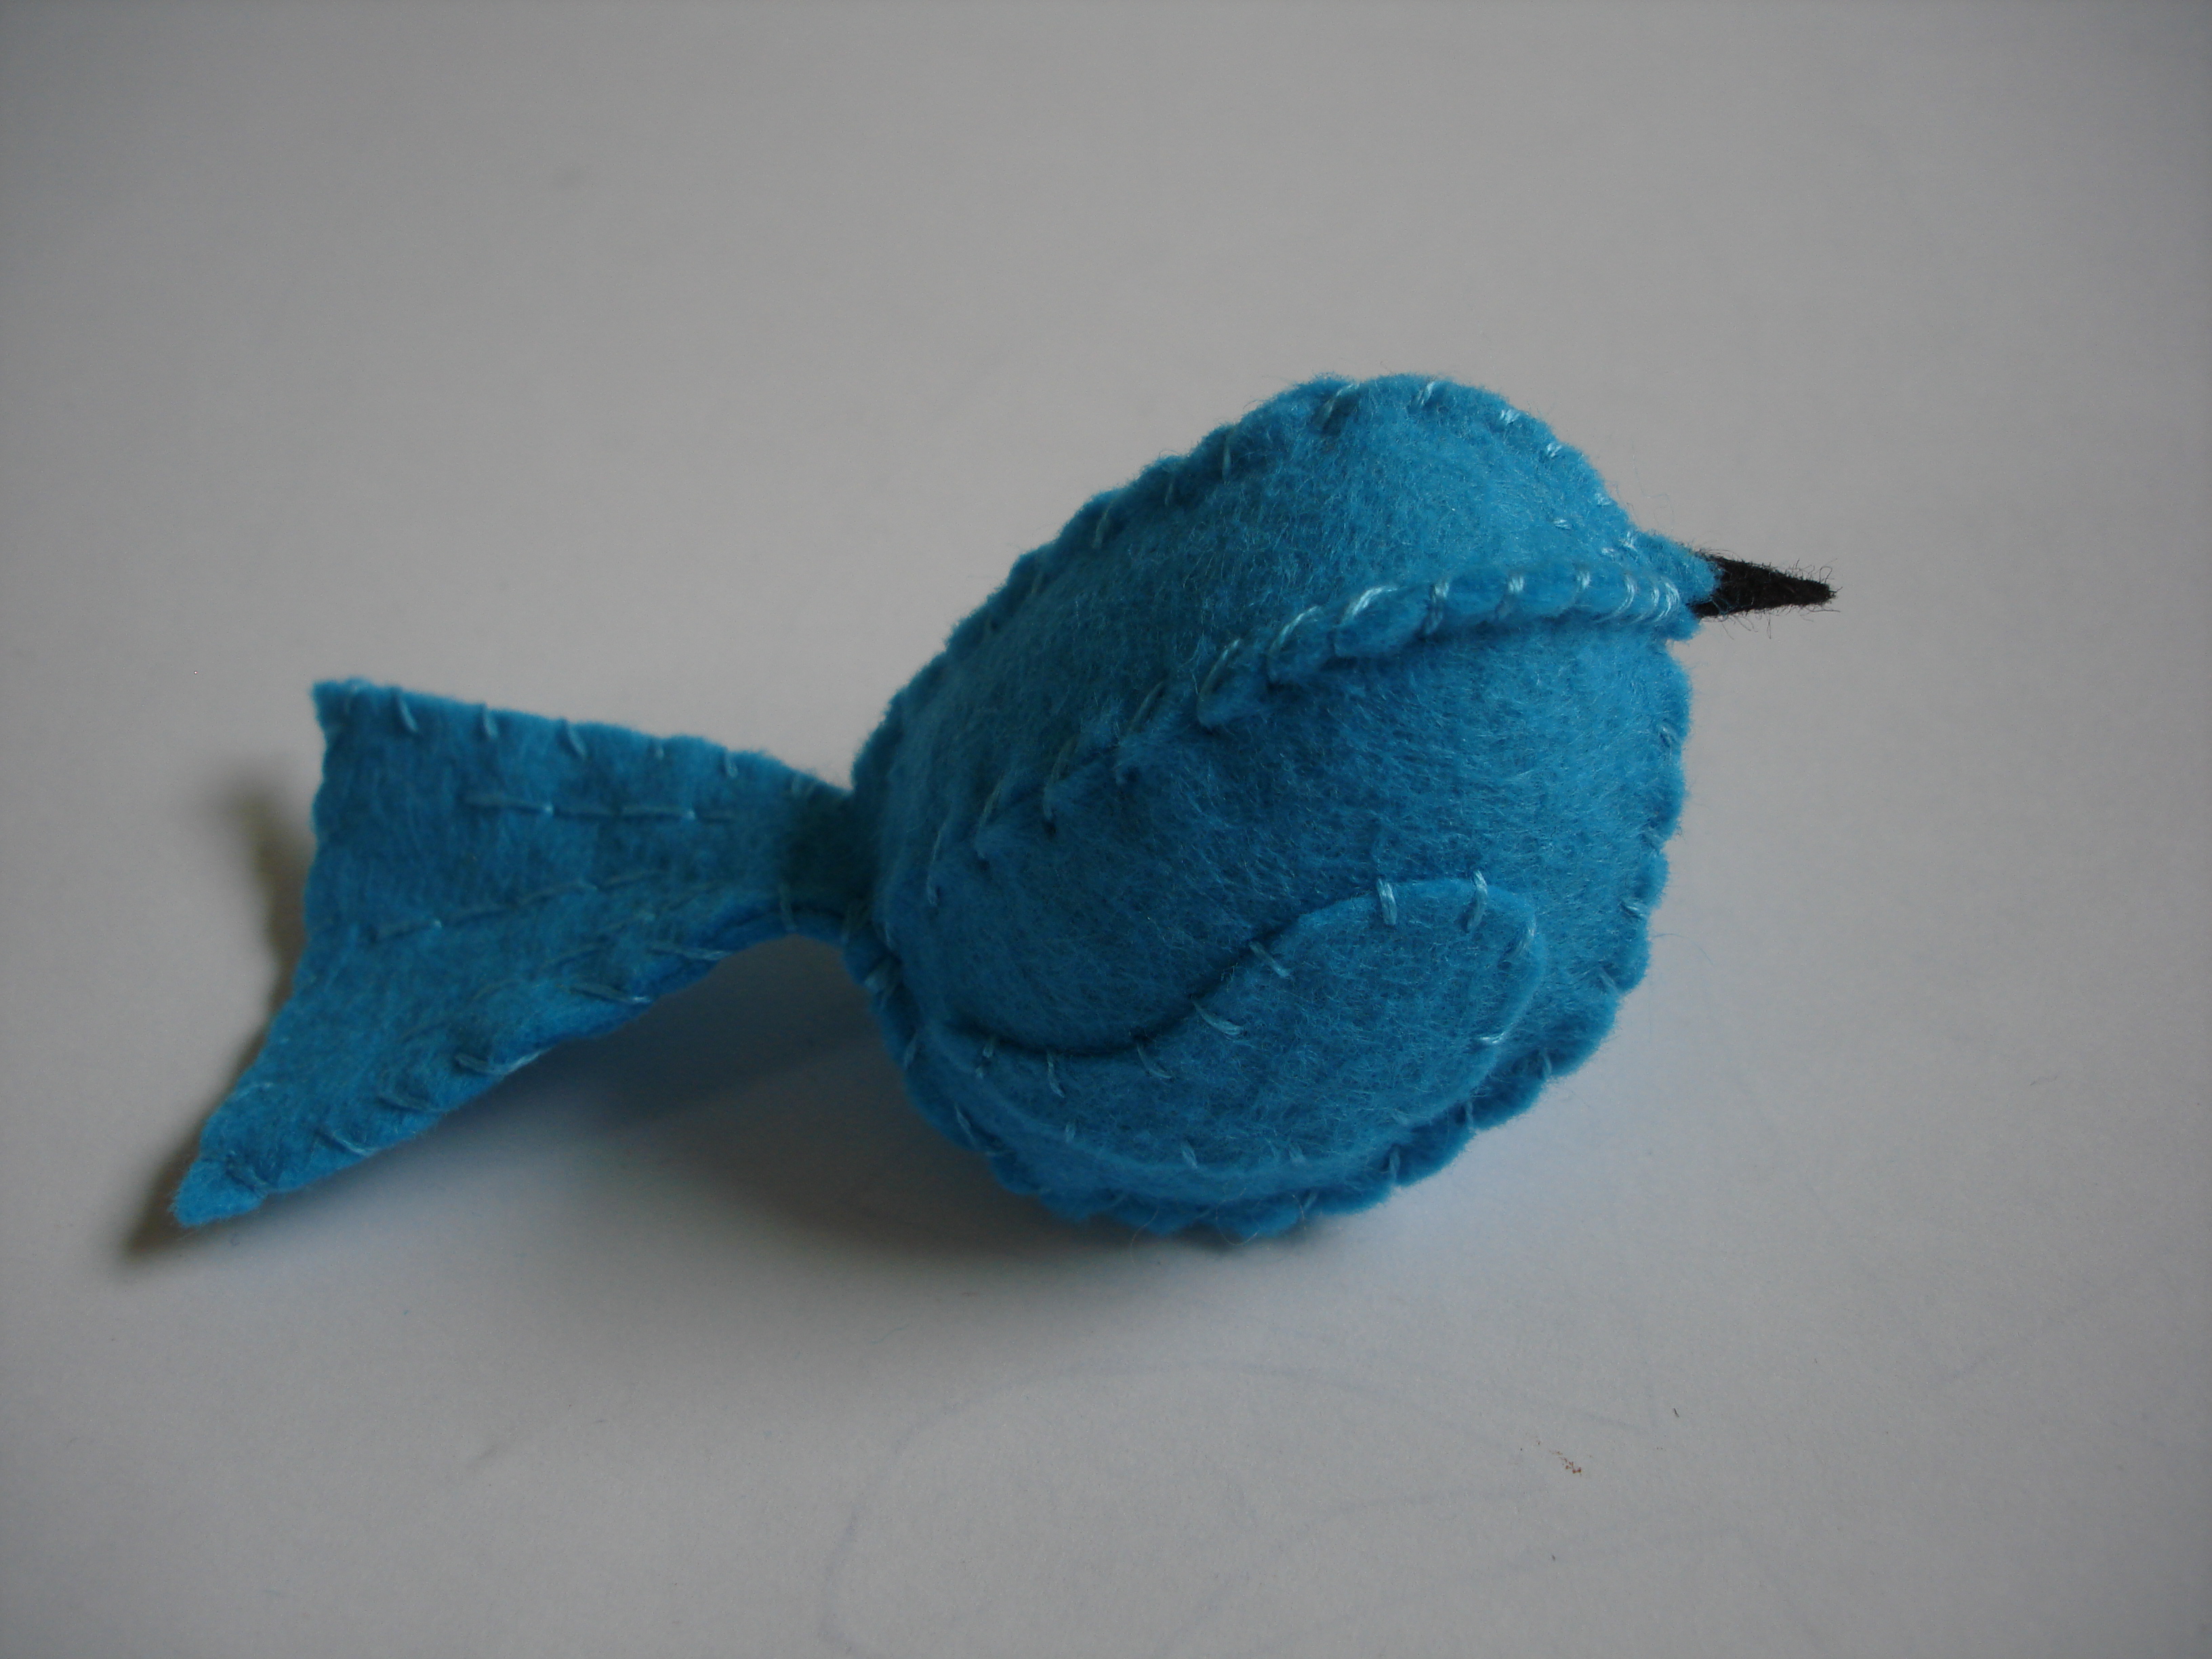
Western Blue Bird
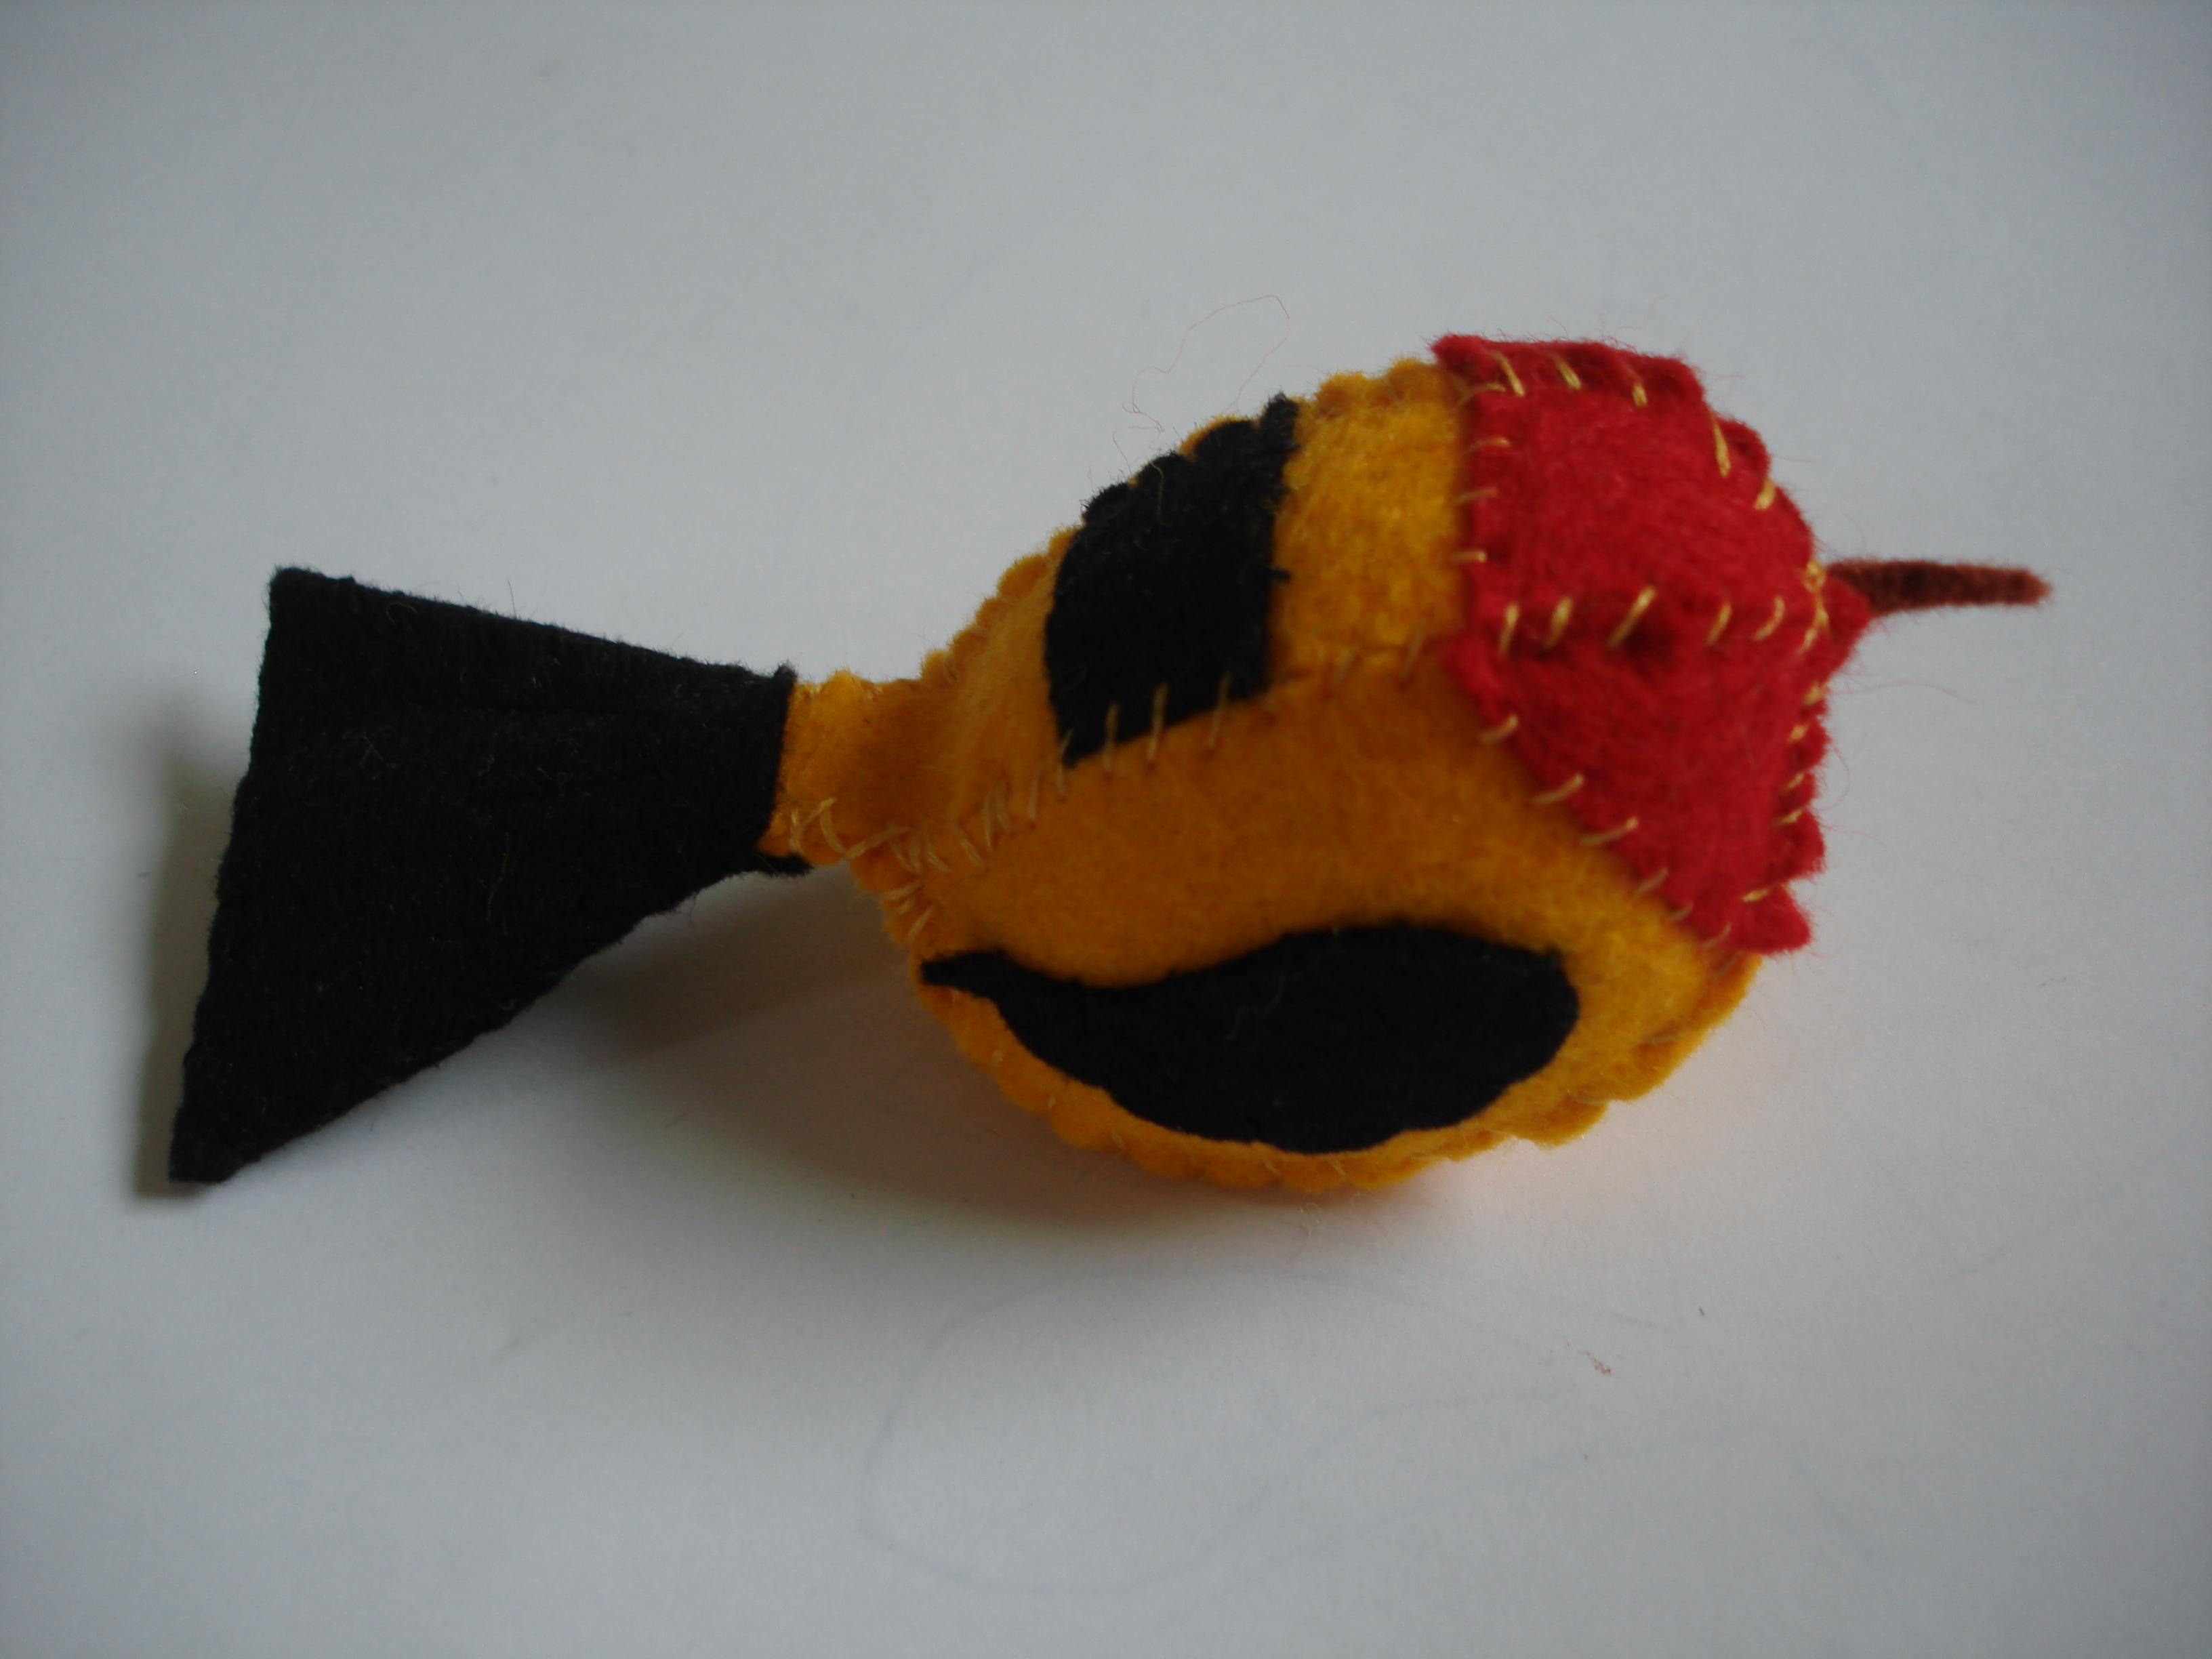
Western Tanager

Dark Eyed Junko

Black Caped Chickadee
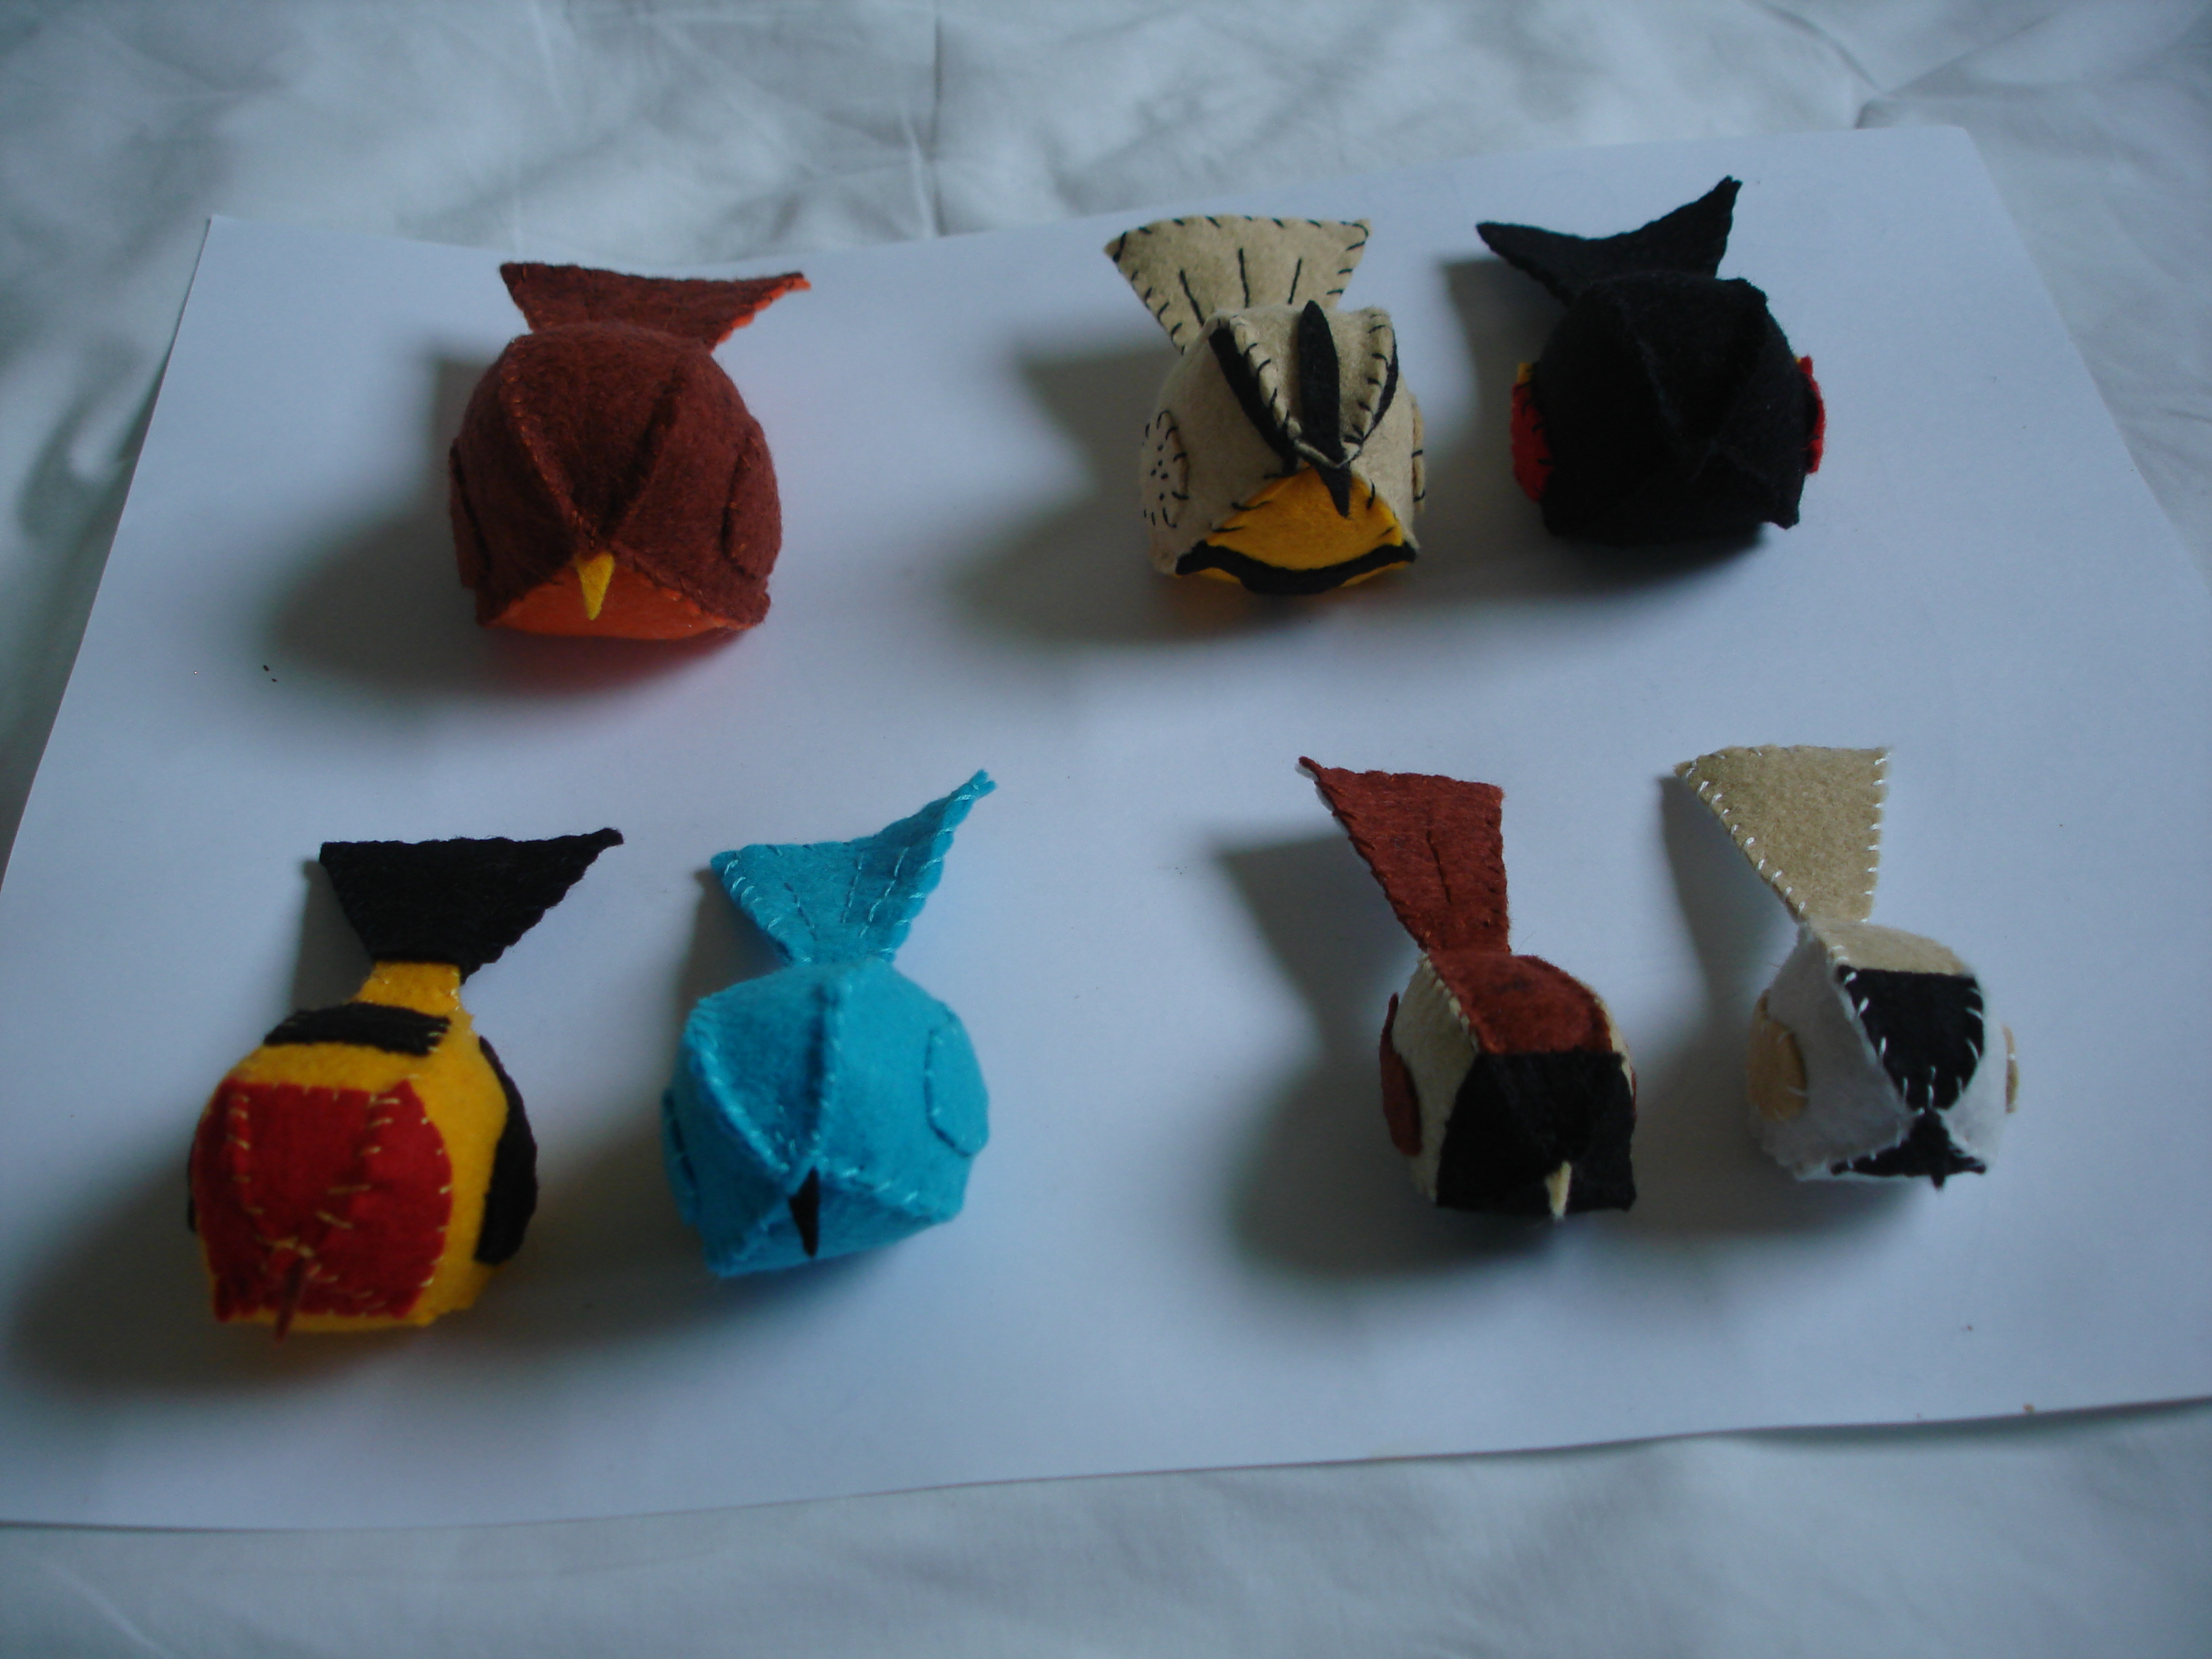
All for size comparison. While they aren’t true-to-life size, they are sized relatively.
I’m having the pattern tested now and hope to have it available in my etsy store soon!
Google used to be such a great package. I am not as happy with it anymore, though – especially since they are tying everything (specifically Picasa Web) into Google +.
I have met my photo data limit and, if I want to add any more pictures without paying their monthly fee, I need to delete some photos. But some of those albums have copious notes with the photos. A brief search reveals no solutions to this. :/
I guess I can copy each comment caption to a text file and put it in the folder with the photos, but sheesh … it took lots of time to put those comments in in the first place, so that’s even more work now.
And on top of that, I get a warning that some of the photos are linked to a blog (mainly this one) and they will no longer show up in that blog now that they are deleted. Although those changes won’t show up for 24 hours. I’m sure it’s very much true if those images were used on a Google Site (which is where my Epic Summer Cross Country Train Trip notes are) … so here’s the flip side to the benefits of such an integrated system. :/
UPDATE: Yup … the photos no longer link up in my posts here. So there’s another time sink … Blerg.

After using Warren’s very handy flash to help map the buttons, I’ve assigned some buttons to the MAME software, hooked the computer up to the tv and hacked control panel and was able to load up the Golden Axe!
… I could only move up and left, but STILL … It’s getting nearly done!
Once I finish fixing the control mapping then it’ll be ready to be played. I do have some pretty-fying I want to do:
- Decorative/camouflaging plexiglass to hide the edges of the tv and monitor frame.
- Light effects!
- Bumping speakers!
- Exchangeable control panels. Check out these three cool control panels I got at Burcham’s Metals in Albany! Some of the wires have been cut too close, but that’s the panel that won’t really fit on my cabinet, so that’s ok. I’ll be able to use the buttons and joysticks! I think 3 of them are eight directional joysticks! O.o
- Speaking of which, I need to identify which games can be played with only 4 directional joysticks, cause that’s what I have installed right now.

So, Phil came over and finished installing the MAME drivers on the computer we’re using. Success! The image shows up on the tv, the driver works and games are visible and partly playable! He spent some time mapping commands to the controls, although there are several buttons and joystick switches that aren’t working quite right. Also, I didn’t realize that you need separate buttons for 1 or 2 player selection AND add coins for each player. My job for this task is to install two more buttons (I’m thinking of adding switches behind the “coin” buttons with some LEDs to light them up). Another task is to cut back some of the cabinet so the control board will sit nicely. The joysticks stick out too far and don’t allow the board to lay flat.
Phil’s coming back maybe this weekend or next week with his voltimiter to try to find the problem with the malfunctioning buttons and joystick switches. He’s also going to figure out what voltage is feeding the light bulbs so we can put the right ones up in the marquee. I’d like to close that up and have the lights be functional soon.
I’d gotten some small computer speakers from Goodwill last night, but they did not work so I’ve got to take them back and get some others. That’s it for the MAME right now! Wahoo!
Key map
Now that the controls are ready, a lot of the MAME is out of my hands. My friend, Phil, was interested in setting up the computer to run the emulator. He’s decided to run Linux on the computer and has been trying to find something that will allow output to an old tv. My other friend, Alex, has spent a lot of time finding games. He’d also mentioned to me that he’d map the emulator keyboard commands to match the buttons/joystick wiring. I sent him this picture today so he’ll know which key is associated with which button. I also took a few minutes and fixed the hole where the second joystick is going so it didn’t interfere with it anymore. We’re just waiting for the computer stuff now and then we can test it! Yay!


I finished wiring the joystick bases and other buttons from the control panel to the keyboard board! Yay! … Although, the hole through the wood is not quite big enough for the second one, so I have to take the box off the back, and grind the hole out a bit more before I can get the handle through. AND… I haven’t tested them yet, so I don’t know if they work or not. I’ll have to wait for Phil to come and bring his voltimeter. I really should just get one for myself. Phil also needs to finish working on the settings on the computer so it’ll work with the tv. SO CLOSE!!
And then … the pretty-fying!
http://lh4.ggpht.com/_7Y5X2BoXw4M/SlJgN6h2FuI/AAAAAAAABHQ/Xk-lPT9Xhx4/s144/Mouse%20solder%20070509.JPG
http://lh5.ggpht.com/_7Y5X2BoXw4M/SlJgPPwq7kI/AAAAAAAABHU/DDZsrpxY0XY/s144/Mouse%20back%20070509.JPG
http://lh5.ggpht.com/_7Y5X2BoXw4M/SlJgQfpxk4I/AAAAAAAABHY/iU7U6jyOjGs/s144/Mouse%20done%20070509.JPG
http://lh3.ggpht.com/_7Y5X2BoXw4M/SlJgSJ-8RBI/AAAAAAAABHg/2UuN1gxdty0/s144/control%20on%20cabinet%20070509.JPG
Ok, so I forgot to keep up on what I’ve done. Once I bought some solder, I soldered the wires into the board! It went so well – I’m a natural. 😀 And it’s ready to attache the buttons to the keyboard board. Yay!


Now, while I was working on the control panel and mouse hack, my friends, Phil and Alex, were working on hacking the keyboard board. It’s nice to have buttons and joysticks, but how do you get them to talk to the computer? We referred to many web tutorials and decided to take an old keyboard apart and use it’s board to receive the control panel actions.
First, you’ve gotta take an old keyboard apart. What you’ll probably find inside is a rubbery, nubbly sheet, three transparent sheets of plastic, and the board. I plan to use the nubblies in a tentacled costume later, but you might just throw it out. Two of the three clear sheets are lined with conductive material that, when the dots come together, complete a circuit and are identified by which row and column are closed. Warren and I spent an uncomfortable evening following the little metal lines around, labeling which keys were on that line. We made a chart that shows which row and column each key was associated with for later mapping in the MAME software.
But the boys got to play with the board. First, they pulled out the connection pins in the board where the transparent sheets used to hook up to it, and then they soldered wires into the spaces. We decided spades at the ends of the wires would let us hook up and change multiple buttons most easily. The board hooks up to the computer using the same port the keyboard always did, but now it will interact with buttons instead.